
A pegboard is a useful tool for organizing your tools. It allows you to see and access all your tools at a glance, so you don’t have to dig through drawers or cabinets to find what you need.
For a pegboard system to be truly effective, you need to organize it in a way that makes sense and maximizes space. Not sure where to put your hammer, what size hooks to use, or how to keep everything tidy? Here are some tips for organizing your tools on a pegboard.
What Can You Store on a Pegboard?
Before we dive into organization tips, let’s first establish what types of tools you can store on a pegboard. The answer is virtually anything that has a hole for a hook and isn’t too heavy!
- Hand tools such as hammers, screwdrivers, pliers, and wrenches
- Power tools such as drills and jigsaws
- Gardening tools, such as shovels and rakes
- Crafting supplies like scissors and rulers
- Kitchen utensils, including spatulas and ladles
As long as you have the right hooks and accessories, you can attach almost anything to a pegboard.
What Type of Pegboard Should You Use?
You may already have a pegboard in your garage or workshop, but if not, you will need to purchase one. A few types of pegboards are available. Some factors to consider when selecting a pegboard include size, material, and color.
Pegboards come in various sizes, from small panels that you can hang on a wall to large panels that cover an entire wall. Consider the number of tools you have and the available space before choosing a pegboard size.
Pegboards are typically made of metal or plastic. Metal pegboards tend to be more durable and can hold heavier items than plastic ones. Plastic boards may be better for lightweight tools or for use in humid areas.
Some people prefer a colored pegboard so it stands out and makes it easier to spot tools. White or light-colored pegboards are also helpful for seeing tools in dimly lit areas.
At Wall Control, we carry industrial pegboards in different sizes, materials, and colors. You can also find pegboard accessory kits that come with a variety of hooks and holders to get you started. These boards and accessories attach to walls, as well as industrial fixtures such as pallet racks. Visit our website to explore our selection and start creating your own customized pegboard system today!
Tips for Organizing Your Tools
Now that you have your pegboard and tools ready, it’s time to start organizing! Here are some tips to help you create an accessible and visually pleasing setup on your pegboard.
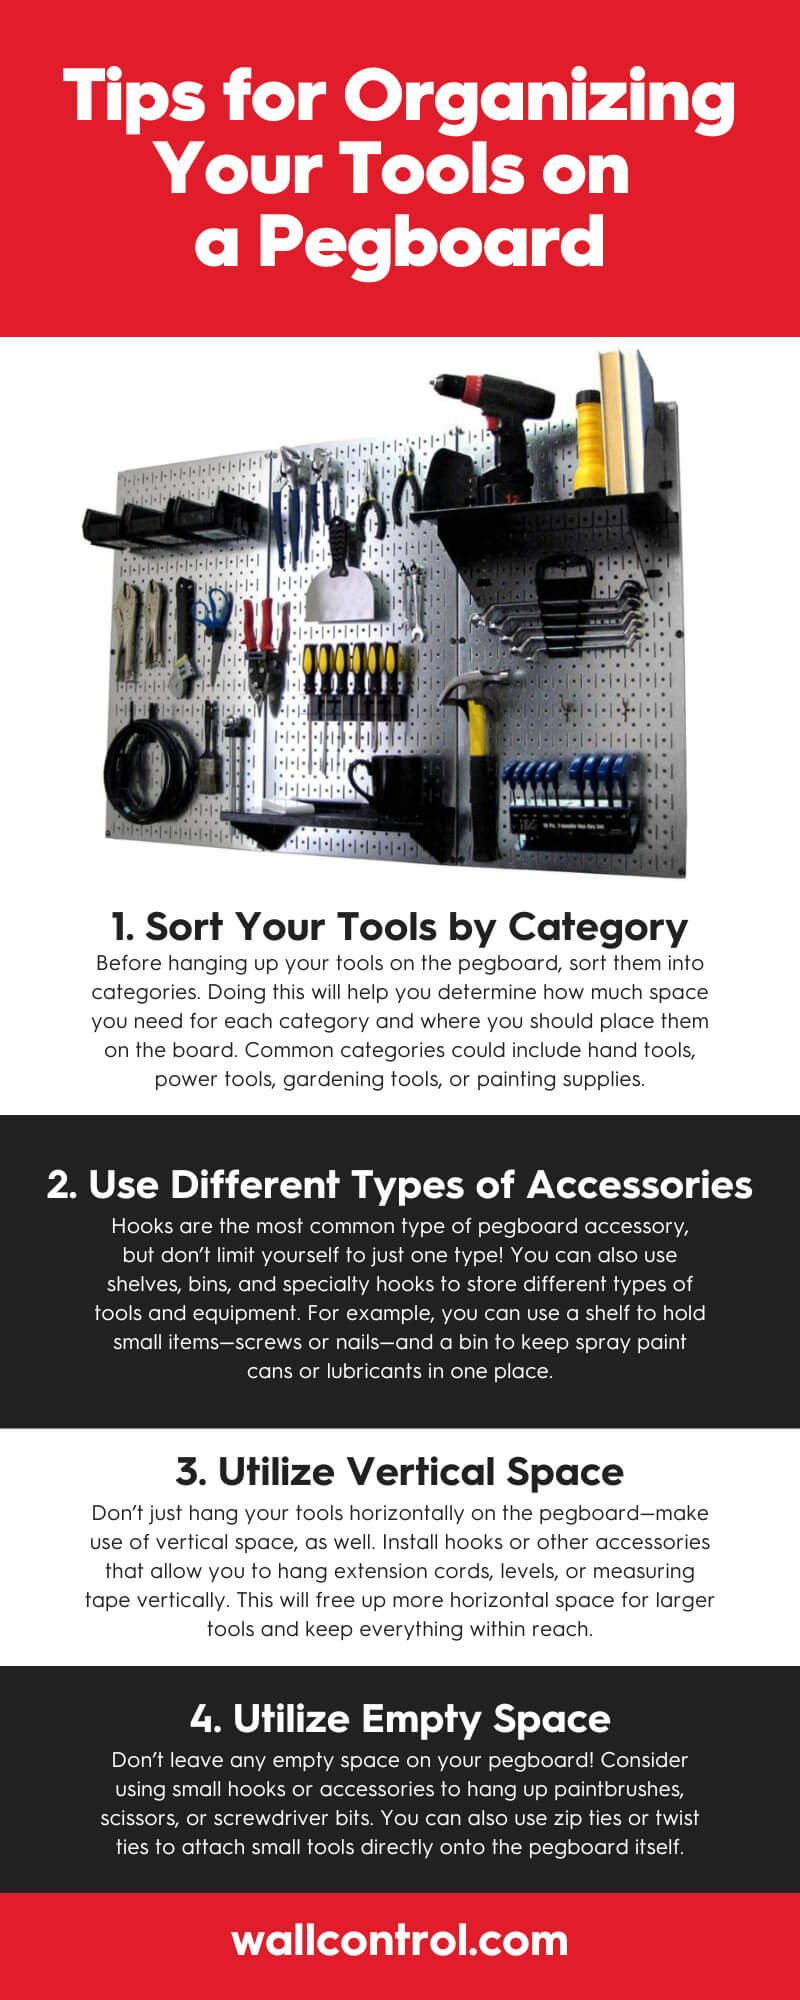
1. Sort Your Tools by Category
Before hanging up your tools on the pegboard, sort them into categories. Doing this will help you determine how much space you need for each category and where you should place them on the board. Common categories could include hand tools, power tools, gardening tools, or painting supplies.
Once you’ve categorized your tools, you can plan out the layout on the pegboard. Consider placing frequently used tools in easily accessible areas, and store infrequently used items towards the top or bottom of the board.
2. Use Different Types of Accessories
Hooks are the most common type of pegboard accessory, but don’t limit yourself to just one type! You can also use shelves, bins, and specialty hooks to store different types of tools and equipment. For example, you can use a shelf to hold small items—screws or nails—and a bin to keep spray paint cans or lubricants in one place.
You may also want to consider using pegboard baskets or holders for oddly shaped items, such as hammers or pliers. These accessories can keep your tools upright and prevent them from falling off the board.
3. Utilize Vertical Space
Don’t just hang your tools horizontally on the pegboard—make use of vertical space, as well. Install hooks or other accessories that allow you to hang extension cords, levels, or measuring tape vertically. This will free up more horizontal space for larger tools and keep everything within reach.
You can also attach a small shelf or magnetic strip to the top of your pegboard for additional storage options. Think outside the box when it comes to utilizing available space on your pegboard.
4. Utilize Empty Space
Don’t leave any empty space on your pegboard! Consider using small hooks or accessories to hang up paintbrushes, scissors, or screwdriver bits. You can also use zip ties or twist ties to attach small tools directly onto the pegboard itself.
5. Label Your Tools
You can make it easier to find and return tools to their place by labeling them with their names or categories. Use adhesive labels, tape, or a permanent marker to label each tool. By doing this, you can keep your tools organized and prevent them from ending up in the wrong spot.
6. Use a Color-Coding System
Another helpful organization tip is to use different colored hooks or labels for each tool category. For example, all hand tools could have red labels and accessories, while power tools could have blue. This method can make it easier to identify which tools belong in each section and keep them organized. Plus, it adds a bit of color to your pegboard!
7. Regularly Review and Rearrange
As you continue to use your pegboard, regularly review and rearrange your tool organization. If you get new tools or change your workflow, you may find your current setup is no longer efficient. Reassess and make changes as needed to keep your pegboard working for you.
With these tips for organizing your tools on a pegboard, you can create a neat, functional system. Keep in mind one person’s pegboard setup may not work for another, so you’ll have to experiment to figure out what works best for you. Once you find that sweet spot, maintaining the order will be a breeze, and you’ll always know where to find the tool you need!
Share:
The Ultimate Beginners’ Guide to Hanging a Pegboard
4 Pegboard Accessories That Are Must-Haves